

How E-Scouting Leads to More Hunting Success
We have all probably been there. On a new parcel of land, excited to see what is there, and have no idea where to start. This is the position that thousands of hunters have been in for centuries, and granted, they were successful! We live in an age where time is always limited and we need to make the best use of our scouting and hunting while we are in the woods. E-Scouting is a way to scout possible hunting areas for the quality of habitat without ever setting foot there.
Hunters E-Scout by examining Satellite Images, Topo Maps, GIS maps, and publicly available e-charts. Look for areas of likely animal activity and then go look at them in person. E-Scouting narrows down your on the ground scouting efforts to higher probability areas.
If you use a computer, E-Scouting is right at your fingertips, 24 hours a day 365 days a year. It can save you hours of unfruitful time trying to find pinch points that you would have easily seen using the bird’s eye view of google maps. In this post, I go over how I E-Scout for whatever game animal (deer, caribou, bear, moose, Turkey) I am looking to harvest and how I come up with a plan for success.
How to E-Scout
The practice of E-Scouting is relatively new, but using maps to identify likely places to hunt has been practiced by successful hunters for centuries. My dad has a saying, “If you fail to plan, you plan to fail” and another “If you are aiming at nothing you are bound to hit it.” I bring these up because good E-Scouting is a STARTING PLACE for any well-rounded scouting effort in a new area.
The point I am making is that for me E-Scouting doesn’t completely replace the need for on the ground research. It gives me an “X” on the map to go and look. The whole process of E-Scouting is looking for high-probability areas to narrow down, for example, some of the best places to hunt turkeys.
Identify Access with E-Scouting
This is the beginning step of the process. The first thing I look for is property access. The easiest way for me to know if a property is going to be over-pressured is if it is easy to get into. That said, many small properties that have good access will be overlooked because they seem insignificant and unlikely. If you find a small pocket of publicly hunt land it may be worth looking at.
Once I identify that there is limited access to a property, I will start to dig deeper.
Look for Obvious Sign
I was given permission to hunt a small, privately owned property that had a power line running through the center of it. I was pleasantly surprised when I saw multiple deer trails plain as day on google maps (the map used in Trophy Tracks).
Before I even set foot on the property I knew a few places that were obviously being regularly traveled. My first scouting trip put me within 70 yards of deer on the trail I had seen from the satellite image.
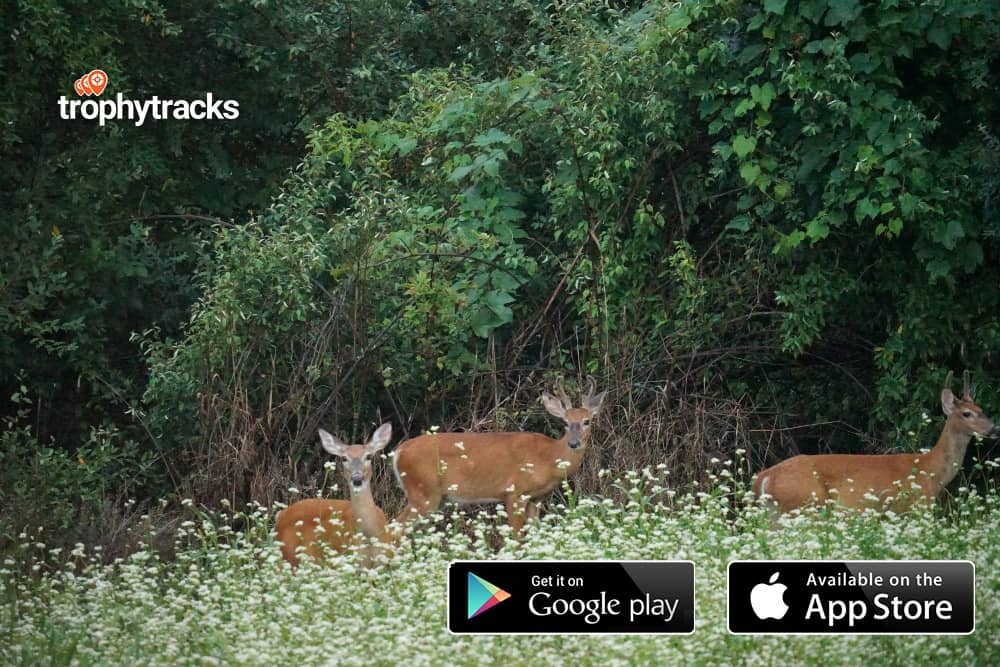
Look for trails, watering holes, and even animals caught in a perfectly timed shot. Follow this up with boots on the ground scouting. Some of the maps are not updated for several years. The deer trail you saw on satellite may not be used now because a new neighbor moved in with a bunch of dogs, (I experienced that once).
Identify Terrain Features
This section varies by the animal you are looking for and the location you hunt. When hunting for white-tailed deer I look for wooded ridge tops, ridge points, swamps, likely food sources, and areas with immature trees. Look for overgrown homesteads where apple trees and pear trees are likely.
Natural Pinch Points
This needed a short section for itself. A pinch point is usually caused by a terrain feature or building development, extremely thick cover, a deep creek that becomes obviously shallow at one area where animals are more likely to cross, etc.
Anywhere that an animal will obviously be less likely to travel butted up against an easy to travel space I would consider a pinch point. Do not overthink this. If it looks like a possibility on the map, check it in person. Don’t write it off because it looks too small.
Example: a 60-yard wide strip of wooded land between a highway fence and a field. The deer are likely to stick to the cover of the woods.
Plan Your Scouting and Hunting Route
I think one of the biggest problems most hunters have when trying to get to know a hunting property is not planning low-impact access for scouting and hunting. I have scouted with people before who have no hesitation to walk into an area that likely holds a mature deer with the wind at their back. Mature deer will not put up with someone barging into their territory.
Plan Access With Wind
With map in hand and weather information in mind, look at the property and find the path with the least impact on the hunting area. If that means walking the state property line for a mile and then heading into an area then that’s what you should do.
I have gone through stages in my hunting experience where I have been careless with scent and times I have been very careful. One thing I know from my experience, regardless of the animal you are hunting, it doesn’t like human scent.
As you plan for the hunting season, consider how you will get into the area with a prevailing (normal) wind and alternate wind conditions. You can log this information in TrophyTracks to help you remember your access to multiple stand locations.
Perpendicular Access
For the best access without spooking your target animal, consider perpendicular access. This method is laid out well on the whitetail solutions website. In short summary, try to plan your scouting and hunting access perpendicular to the regular travel of your game animal. This not only limits the amount of scent you spread on trails but also keeps spooking animals to a minimum.
In seasons past there was a location I hunted I called the “Buck Hole”. If the wind wasn’t in the perfect direction the deer were not there. If the wind was going in the right direction, for them to be there, accessing the area was very challenging.
Inside TrophyTracks, you can easily record this information and watch trends in activity to get a step ahead. More on that later!
Western Hunting E-Scouting Considerations
So far in this post, I have used the example of whitetail deer hunting. For western hunters going after Elk, Moose, Bear, Mule Deer, etc., all of this still works, albeit you are looking for other places like burn areas and water sources.
I hunt in remote Alaska for Moose, Caribou, and Black Bear. I plan my access, water supply areas, and camping sites and stick to them. In areas where communication is challenging, I encourage hunters to make a plan and stick closely to it. Bear attacks are on the rise in the western states and accidents don’t only happen to other people.
If someone goes missing, I’m sure they would want to be found as soon as possible. The only way for that to happen is by leaving a plan with someone and sticking to it unless you can communicate otherwise.
E-Scouting with Free Hunting Tools and Apps
If you are new to the World of E-Scouting you may already be familiar with Google Maps, but are you familiar with Google Earth? Google Earth is fascinating and a valuable tool for hunters, and it’s FREE, just like the standard Trophy Tracks plan (more on that next). You can adjust the sharpness of the images to help you identify more detail and sometimes even pick out game animals that were captured in the photo!
NASA EOSDIS Worldview gives a day to day Satellite imagery option for places you are completely unfamiliar with. The images are not very clear, but it gives you an idea of what to expect. I use this tool to identify when an area starts to green up when planning a spring bear hunt.
Logging Your Scouting and Hunting Intel
This is another key part of E-Scouting. Logging what you find in an organized and easy to understand space for future reference can be a huge tool. As I said, the beginning stage of E-Scouting is finding a place on a map to go and check out. Boots on the ground scouting tells you what you couldn’t find out by looking at a computer screen.
If you are like me, with all the other distractions of life it is easy to flush information that you haven’t used recently. I use Trophy Tracks to help me remember the information associated with a hunt or scouting trip that I may not remember otherwise.
Dropping Pins
In the app, I can pin a location, trail cam, stand, or access point and start a log, record the weather, sign, which direction the animal came from, what the wind was doing, etc. Once you get to the location you E-Scouted and find sign, open trophy tracks, start a new log, and select scout. Log the observations you make for future reference when deciding where to set up.
Journaling and Tracking
When you log information on the day and time of the experience, it automatically logs the weather conditions from that day. This means that you can easily identify trends. You can identify the time, barometric pressure, wind direction, and temperature the animal you are after is likely to show up by tracking and identifying when that animal is active. That information is available at a glance to help you plan.
I also use it to mark my hunting locations, my camping locations, where my trail cameras are, and it can even be used to log related activities like patterning a shotgun, what round I used on a bear for an instant kill, or good experiences with the right hunting gear.
If you have past scouting information you want to log or are out of cell coverage, fear not. You can log the information retroactively when you are home or back in service. Pick the day, and the weather will be logged correctly for you.
Easy Access and Organization
The more concise and organized information you have available to you, the better off you will be for years to come. Tracking your experiences helps you learn. That is what Trophy Tracks is all about, helping hunters have easy access to their organized scouting and hunting information for better success for years to come. If you are looking for past logs on bear hunting you can go into the Journals feature and filter for bear. Finding your information for future planning won’t be time-consuming.
Predict Success With Pro
For more statistics and tracking data consider using the Trophy Tracks Pro Version. With access to additional real-time data in the pro option, as well as more tracking and logging options, your ability to predict success is even higher.
Closing Thoughts
This post was not only designed to help hunters know how to E-Scout but also to point them to some valuable tools to help them be successful. Use the mapping intel to identify areas that have a high probability of producing the animal you are looking to harvest, and then go scout it out on foot.
Nothing completely replaces the real time on the ground scouting, but E-Scouting eliminates wasted time and helps prevent spooking animals out of the area you want to hunt.
Use up to date weather information to help plan entry and exit from a hunting location.
Aim for something and you’ll hit it!
Guest Post by Evan Grimm
Evan Grimm is an outdoor content writer that dives deep into topics to produce informative and practical content. He is a TrophyTracks user and contributor, the owner of ETHIC Digital Products, and is heavily involved in non-profit ministry where he and his family now reside in Alaska.