

Trail Camera Strategies for Preseason Archery Success
Trail cameras are one the most effective tools a hunter can use in preparation for archery season. Few tactics provide the level of insights into deer behavior as trail cameras. With the right trail camera strategies prior to archery season, you can gather essential information about deer movement, feeding habits, and bedding areas. Information that will increase your chances come opening day of archery season. The team at TrophyTracks put together the best trail camera strategies for preseason deer archery hunting, ensuring you get the most out of your scouting efforts.
Understanding how to use trail cameras effectively is not just about placing them in the right spots. It’s about adopting a strategic approach that aligns with the unique challenges of archery hunting. Unlike rifle hunting, archery hunters need to get close, making it crucial to understand the movements and behaviors of deer. By mastering trail camera strategies, you can identify the specific patterns and locations that will bring you within a bow shot of a buck, making your preseason scouting both precise and purposeful.
3 Trail Camera Strategies To Elevate Your Archery Season
1. Choosing Optimal Trail Camera Locations
One of the most critical aspects of using trail cameras effectively is placing them in the right locations. To do this, you’ll need to understand deer movement and the habitats they prefer. Pro tip: Use your past TrophyTracks logs to pick spots with previous deer observations for trail camera setups. Here are some additional key areas to consider:
- Food Sources – Deer are creatures of habit and follow regular feeding patterns. Place game cameras near food plots, agricultural fields, and other natural food sources. These setups will isolate the best food sources to hunt in early archery season.
- Water Sources – In summer, deer will frequently visit water sources. Also, they will use these same water sources in early archery season. Positioning a trail camera near a pond, creek, or waterhole can give you valuable data on the timing and frequency of deer visits.
- Trails and Funnels – Deer often use established trails and natural funnels to move between bedding and feeding areas. Setting up cameras on these paths can help you identify the most frequently used routes. In addition, these locations will help you narrow down routes used by mature bucks versus doe groups.
- Bedding Areas – Although more challenging to pinpoint, placing a trail camera near suspected bedding areas can reveal when deer leave and return. Bedding areas are a key place for early season archery stand locations. Nailing down this location is one of the best preseason trail camera strategies.
- Mock Scrapes – These locations are designed to survey bucks on your property. Use an attractor like one of the Heated Hunts early season scents (check local regulations) near a treestand location. Buck observations can be logged in TrophyTracks as quick observations and images can be stored in the TrophyRoom for reference during archery season.
2. Optimal Trail Camera Settings and Placement
Once you’ve identified locations, it’s essential to set up your trail cameras properly. Proper setup helps to maximize the quality and quantity of pictures you collect. Therefore, consider these trail camera strategies for placement to avoid bad images and wasted effort.
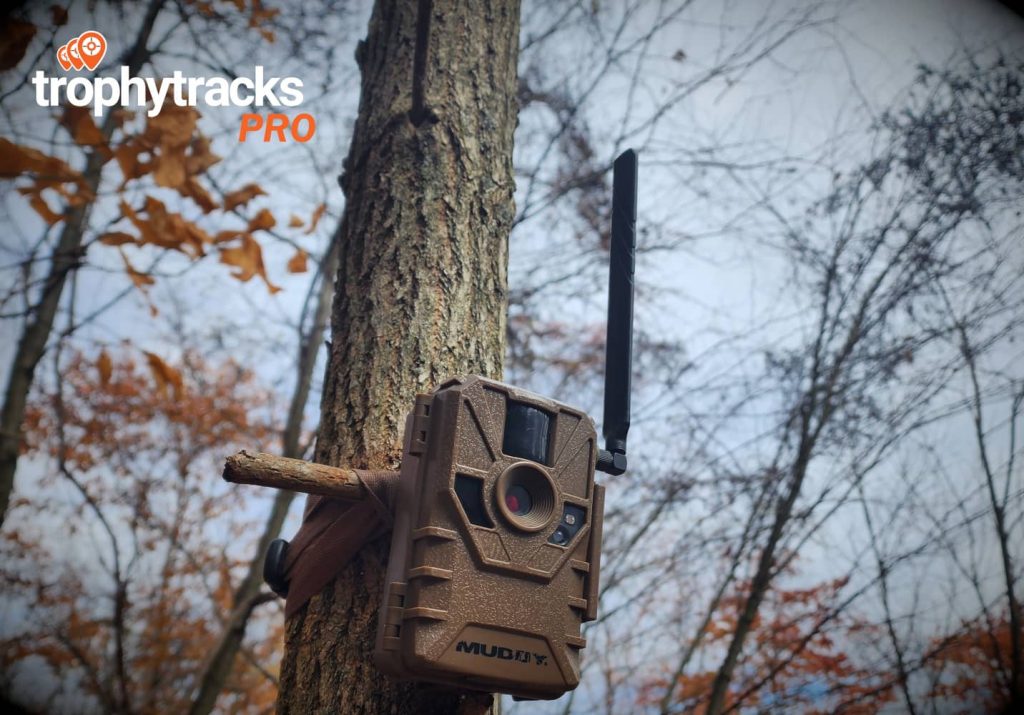
- Height and Angle – Mount the camera at a height that captures the deer’s body, typically 3-4 feet off the ground. Angle the camera slightly downward to cover more ground and ensure you get clear images of deer as they pass by.
- Distance from the Target Area – Place the game camera about 10-20 feet from the target area to ensure clear, identifiable images. If you’re covering a larger area like a field or food plot, you may need to increase the distance slightly.
- Sensitivity Settings – Adjust the trail camera’s sensitivity to match the environment. In dense areas with a lot of foliage, a lower sensitivity setting will prevent false triggers from moving leaves or branches. In open areas, a higher sensitivity setting can help capture deer from a greater distance.
- Time-Lapse Mode – Consider using the time-lapse mode to capture images at regular intervals. This feature can be particularly useful in open fields or food plots where deer may move outside the camera’s trigger range.
- Check Your Cameras Regularly – Regularly checking your game cameras, but not too often, is vital. Checking them every 1-2 weeks strikes a good balance between gathering data and minimizing human scent in the area. Always be mindful of the wind direction and try to avoid leaving too much scent around the camera location. In contrast, cellular trail cameras allow you to monitor locations remotely. Although a better option, they do come with a higher price tag and usually a monthly cost.
3. Using Trail Camera Data to Plan Your Early Season Archey Hunts
The best trail camera strategies are meaningless without using the data you collect. With TrophyTracks Pro, you can use this data to pattern bucks and narrow down the best locations for hunting early archery season. Here’s how you can make the most of it:
- Identify Patterns – Look for patterns in deer movement, such as the time of day they visit certain areas or the routes they prefer to take. This information is invaluable for planning your hunt and determining the best times and locations to set up your archery stand. TrophyTracks Pro makes it easy to review and analyze these patterns. The hunting app allows you to see insights at different locations and plan your archery stand locations with the data from trail cameras.
- Monitor Changes in Behavior – As the season progresses, deer behavior may change due to weather, food availability, or hunting pressure. Keep an eye on these changes and adjust your strategy accordingly.
- Track Individual Deer – By reviewing photos over time, you can track individual bucks and learn about their habits and routines. This can help you target specific deer and increase your chances of success.
- Combine with Other Scouting Techniques – While trail cameras are powerful tools, they should be used in conjunction with other scouting techniques like e-scouting, studying past hunting logs, and analyzing buck sign.
Find the Best Deer Stand Locations with These Trail Camera Strategies
In conclusion, preseason work takes time but is a rewarding endeavor. By implementing the best trail camera strategies, you can gather information that will guide your hunting decisions and improve your archery hunting season. Remember to place your cameras in strategic locations, optimize their settings, and carefully analyze the data you collect. Combining these trail camera strategies with other scouting techniques will give you a comprehensive understanding of deer behavior and help you find the best deer stand locations to hunt.